🎯 Room API - Stay alerted from Grafana inside WorkAdventure

Summary
8. Listen the Variable Updates
9. Create a new room on the admin dashboard
10. Create the Application Server
11. Create a Project Directory
12. Initialize a Node.js Project
14. Create a TypeScript Configuration File
16. Retrieve a Grafana Alert ID
17. Listen a Grafana Alert Status
18. Retrieve your WorkAdventure API key
Alert! The production is on fire!
Here, at WorkAdventure, we spend our complete work day in our virtual office. It is great for having a quick chat with our colleagues or meetings with clients. But what happens if our production servers go on fire? Wouldn't it be nice to be notified in our virtual office directly, with a red light flashing and a siren screaming? Hell yeah!
We already have alerts set up, thanks to Grafana. We need to find a way to take the alert from Grafana and turn it into a visual red light flashing in WorkAdventure.
This is the kind of new experience that is now possible, thanks to the brand new Room API.
In this article, we will guide you through the process of setting up the necessary components, including creating a map script with alerting features and configuring a server to listen for Grafana alert statuses. We will provide step-by-step instructions and code examples to help you implement this integration effectively.
Architecture
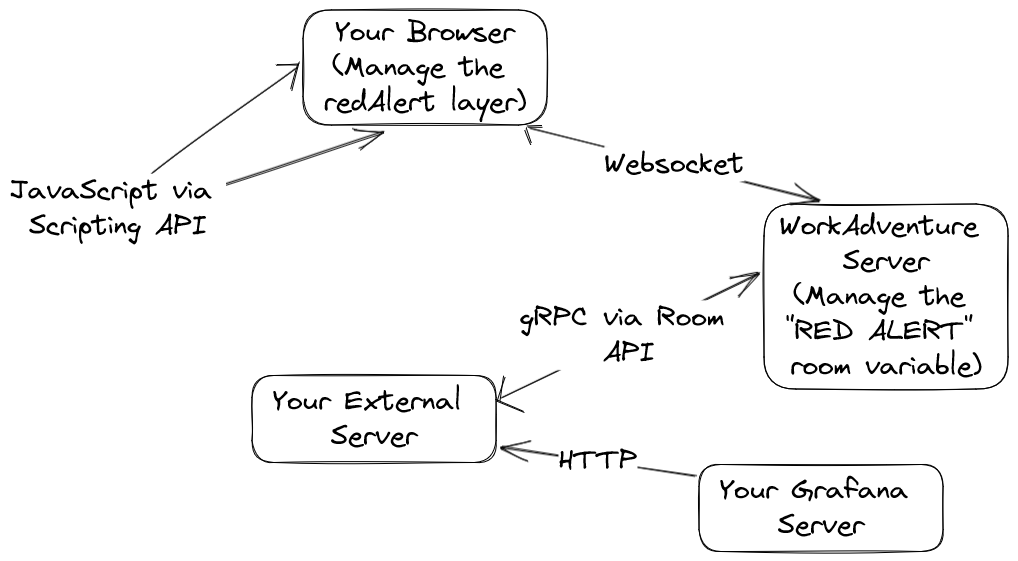
Before getting started, let's take a quick look at the architecture used by WorkAdventure to transfer information from your server to your map. When you open a WorkAdventure page in your browser, it establishes a Websocket connection with the server to send and receive information in real time, such as the user's position or various events that may occur, such as the opening of a door.
Scripts can be attached to a WorkAdventure map. Those scripts are coded in Javascript or Typescript using the WorkAdventure Scripting API. This API is running on the browser side and can be used to alter the map. For instance, you can open a door or make a blinking light appear using this API.
The WorkAdventure server takes care of managing room persistence, broadcasting the position of different users, and broadcasting room variables. Room variables are storing the “state” of the room. They are automatically dispatched between the server and the clients. The server also features an API called Room API built using the gRPC protocol, which allows you to update, read and listen to room variables from a third-party service.
It's this API that we're interested in here, and which will enable us to achieve many things, so let's dive in and discover the exciting possibilities that the Room API can offer.
The Objectives
Play a sound and display a layer which contains an alert on the map when a specific alert is thrown from Grafana.
-
Setup a server which can listen to Grafana alert status and can use the Room API.
-
Setup a server which can listen to Grafana alert status and can use the Room API.
Prerequisites
-
Node.js and npm (Node Package Manager) - You can download them from the official Node.js website.
-
A Grafana Server - You can setup a server by following the official documentation.
-
An account with a world on the WorkAdventure website.
Create the Map
We will create a map in which an alarm will be present and will be turned on or off when a variable is updated.
Copying the Starter Kit
We will start with the WorkAdventure Map Starter Kit. This will give us a good starting point. Follow the documentation on the WorkAdventure Website to create a basic map and put it online.
Design the Map
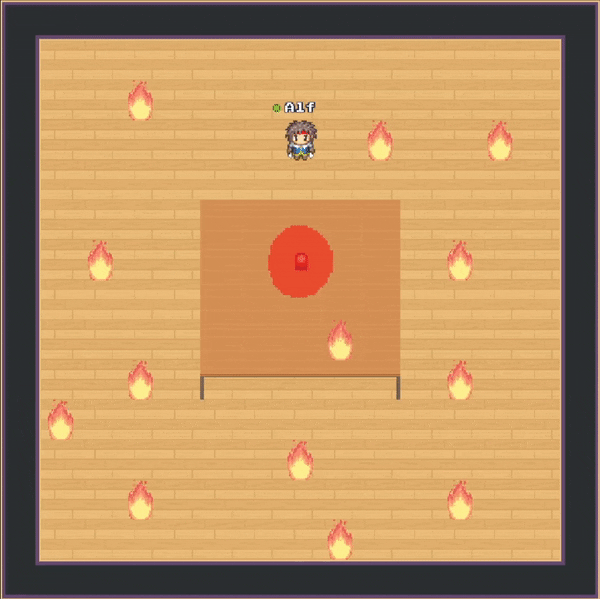
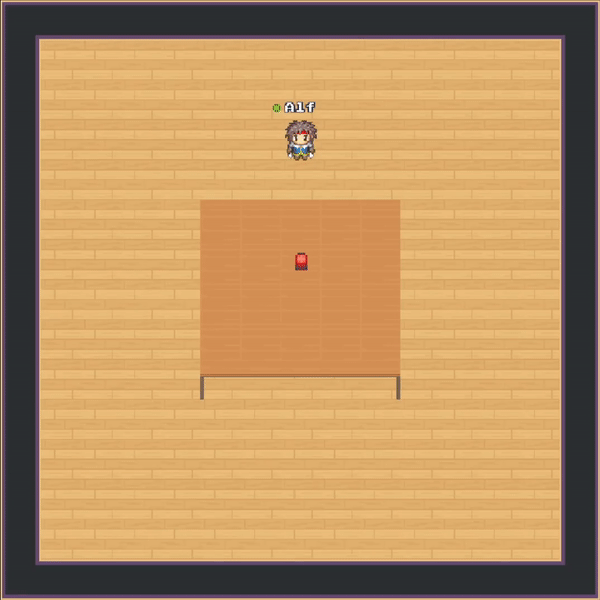
We will make a simple design for our example, the only important element in our map is the addition of a layer named "redAlert" which displays a red light but is not visible by default.
Add a Variable
We create a room variable named "RED ALERT", of type boolean, persisted and with the false value by default. Room variables can be used to share information with all users in a room.
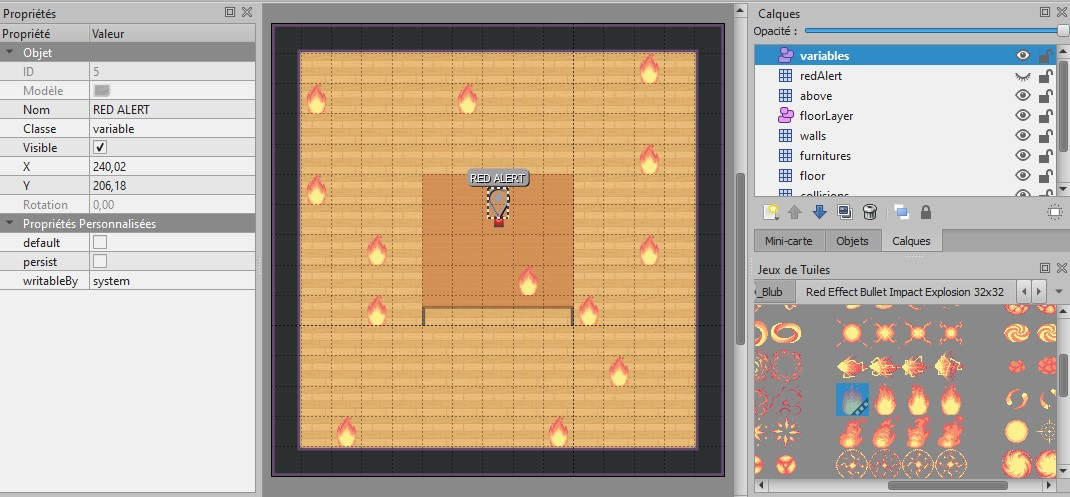
Listen the Variable Updates
Now we are going to modify the `src/main.ts` file in order to listen to the changes of value of our variable. This will allow us to play a sound and display our redAlert layer when the value is true and to stop the sound and hide the layer when the value is false.
console.log('Script started successfully');

// Waiting for the API to be ready
WA.onInit().then(() => {
    // Turn on/off the sound and display/hide the redAlert layer by the status received
    function redAlertSwitch(status: boolean) {
        if (status) {
            WA.room.showLayer(“redAlert”);
            soundAlert.play(soundConfig);
        } else {
            WA.room.hideLayer(“redAlert” );
            soundAlert.stop();
        }
    }

    // Load the alert sound
    const soundAlert = WA.sound.loadSound("alert.ogg");
    // Define the sound config
    const soundConfig = {
        volume: 1,
        loop: true,
        rate: 1,
        detune: 1,
        delay: 0,
        seek: 0,
        mute: false
    };

    // Listen when the variable is updated
    WA.state.onVariableChange(“RED ALERT”).subscribe((data) => {
        redAlertSwitch(data);
    });

    // Get the variable value to check if the value already changed before the user connection
    redAlertSwitch(WA.state.loadVariable(“RED ALERT”));
}).catch(e  =>  console.error(e));
Create a new room on the admin dashboard
Now that our map is ready, we need to create a room on the WorkAdventure dashboard and reference the map. Create your room and keep the URL because we will use this information later.
We have everything we need on the map side. We will now create the small application that will retrieve Grafana alerts and connect using the Room API to WorkAdventure to alter the variable.
Create the Application Server
We will create a Node.js service in TypeScript, which retrieves every minute the state of a Grafana alert and which modifies the value of the room variable defined previously, thanks to the Room API and the GRPC client provided by WorkAdventure.
Note: as an alternative to asking Grafana every minute the state of Grafana alerts, we could make a Grafana Webhook that is contacting our server when an alert is triggered.
Create a Project Directory
Start by creating a new directory on your local machine that will serve as the root directory for your TypeScript project. You can do this using your operating system's command line interface (CLI) or a file explorer.
# Example command in CLI
mkdir red-alert-project
cd red-alert-project
Initialize a Node.js Project
Next, navigate to the project directory in your CLI and initialize a new Node.js project by running the following command:
npm init -y
This will create a `package.jsonfile` in your project directory, which will keep track of your project's dependencies and configurations.
Install TypeScript
Now, you need to install TypeScript as a development dependency for your project. You can do this by running the following command:
npm install typescript --save-dev
Create a TypeScript Configuration File
Next, you need to create a `tsconfig.jsonfile` in your project directory, which will serve as the configuration file for TypeScript. You can create the file manually or use the `tsc` command to generate it with default settings:
npx tsc --init
Create a Grafana API Key
To create an API key on your Grafana server, follow these steps:
Once the API key is created, you will see the generated API key value on the screen. Make sure to copy and store this value securely, as it will be used for authenticating API requests to your Grafana server.
Retrieve a Grafana Alert ID
To retrieve a Grafana alert ID on the admin dashboard, you can follow these steps:
Copy and store this value, as it will be used to get alert status from API requests to your Grafana server.
Listen a Grafana Alert Status
In order to get the status of an alert from the Grafana REST API using TypeScript, we must use `axios` to make HTTP requests, and then parse the response to extract the relevant information :
npm install axios
Now we are going to create a file named `main.ts` and we are going to write code in it to retrieve the status of our alert every minute :
import axios from 'axios';

// Define Grafana API endpoint and headers
const grafanaUrl = 'https://<GRAFANA_SERVER_URL>/api/alerts/<ALERT_ID>';
const headers = { Authorization: 'Bearer <API_KEY>' };

// Function to fetch alert status
const fetchAlertStatus = () => {
  axios.get(grafanaUrl, { headers })
    .then(response => {
      // Extract alert from response
      const alert = response.data;

      // Extract alert status
      const state = alert.state;

      // Display the current state
      console.log(state);
    })
    .catch(error => {
      console.error('Failed to fetch alert:', error);
    });
};

// Schedule the function to run every minute
const interval = 60000; // 60,000 milliseconds = 1 minute
setInterval(fetchAlertStatus, interval);
Retrieve your WorkAdventure API key
Install the GRPC Client
To connect to the Room API, we will be using the `@workadventure/room-api-client` package. Behind the scene, you connect to the Room API using the gRPC protocol so it is possible to connect to WorkAdventure Room API using any language as long as it has gRPC support. If you are using NodeJS (like we do), the @workadventure/room-api-client package contains a ready-to-use client.
npm install @workadventure/room-api-client
Send the Alert to WorkAdventure
We will go back on our `main.ts` file, import the `createRoomApiClient` function from the Room API GRPC client and initialize it:
import axios from 'axios';
import { createRoomApiClient } from "@workadventure/room-api-client";

// Define Grafana API endpoint and headers
const grafanaUrl = 'https://<GRAFANA_SERVER_URL>/api/alerts/<ALERT_ID>';
const headers = { Authorization: 'Bearer <API_KEY>' };
const client = createRoomApiClient('<WA_ROOM_API>');
In the example above don't forget to replace the `<WA_ROOM_API>` by the key retrieved.
On the next line we will define the URL of the map retrieve from the WorkAdventure admin board:
// URL of the room you wish to interact with
const roomUrl = "https://play.workadventu.re/@/my-team/my-world/my-room";
And when we are getting the alert status we will check if the status is `alerting`, if it's true we will update the room variable to true either to false:
const fetchAlertStatus = () => {
  axios.get(grafanaUrl, { headers })
    .then(response => {
      // Extract alert from response
      const alert = response.data;

      // Extract alert status
      const state = alert.state;

      // Set the variable status
      client.saveVariable({
          	name: 'RED ALERT',
          	room: roomUrl,
          	value: state === 'alerting',
        }).then(() => {
        	console.log(`Variable updated`);
        });
    })
    .catch(error => {
      console.error('Failed to fetch alert:', error);
    });
};
Now when the alert will be triggered the variable will be updated inside your map automatically!
Conclusion
As you have seen it is very easy to set up calls to the Room API. We have chosen an example that could speak more to tech people but the use cases are numerous.